Blade Tip Instructions
Aftermarket Acetal Root Plug Installation Instructions for RotorWay Main Blades (rev2 -11/18/20)
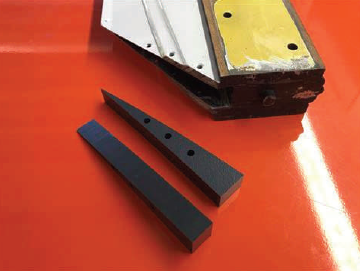
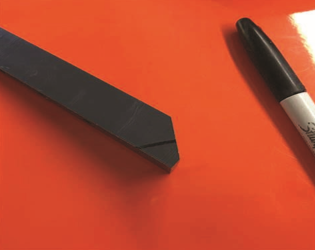
Photo #1Root plugs before cutting. Two cuts will be needed to get them to fit in the blade. There are no cuts on the trailing edge of the root plugs. If the blade was cut per the print and it’s accurate the angle is 43°. Each blade may vary from the print so measure each blade BEFORE cutting root plugs.
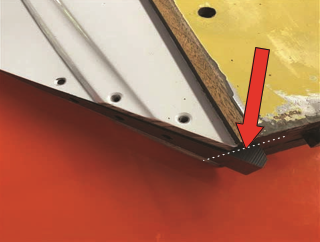
Photo #2
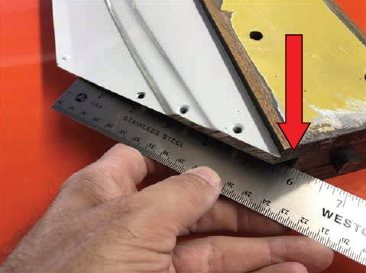
Measure from inside the trailing edge of the blade to the edge of the aluminum spar that is sandwiched between the wood filler blocks. In this example it is 5-13/16”. See red arrow in picture.
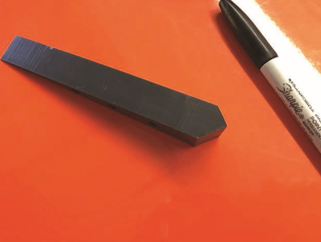
Photo #3
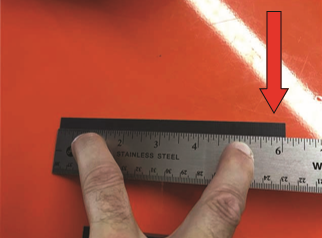
Transfer that dimension on to the top of the root plug and draw a line across the width of the plug. See red and white arrows in picture.
Photo #4
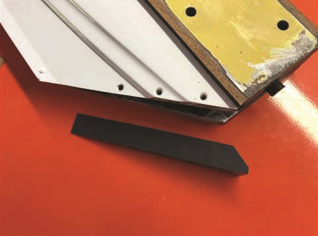
Cut the root plug so the angle cut crosses right through the center of the line. It should be approximately 3/8” in from one side as the plugs are 3/4” think. It should look like the plug in photo 4 to the right. If you are unsure cut it long and work your way in the blade with multiple cuts.
Photo #5The root plug will fit in the blade at this point. Check the angle of your cut to see that it is flush with the aluminum spar between the filler blocks. Adjust your miter if needed. Now scribe a line on the root plug where it protrudes out of the blade. See red arrow in picture.
Photo #6
This is the root plug removed with the scribed line where to cut it off.
Photo #7
This is the root plug with both cuts complete and ready to be test fit. Some light sanding might be needed on the final fit.
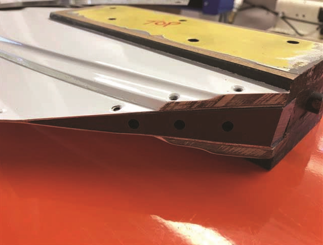
Photo #8
Final fit of the Acetal root plug in the blade.
If you are replacing old wooden plugs you’ll need to match drill your existing holes in the blade into the Acetal plugs and tap them for either 6-32 or 8-32 countersink machine screws, your choice. Do not use wood screws.
If these are new blades you can drill holes where you need them and tap them for 6-32 or 8-32 countersink machine screws, your choice. Do not use wood screws.
Use the longest screw possible for each location for a secure mounting.
Copyright © RotorWay-Rework. All rights reserved.